So, I’ve begun modeling static mesh kits for exteriors and interiors using Blender. I basically have a firm grasp about how it works, except texturing. I’ve heard that overlapping UVs are the way to go, and for seamless results, this of course makes a lot of sense. BUT, how do I go about adding different variations in these UVs to accurately portray different material types? So, for example, let’s say I create a kit that has many different pieces, and the target materials would include concrete, metal, glass, wood and brick on a single overlapped UV map. How do I go about accurately portraying all of these materials on a single mesh that has a single UV map? Should I unwrap each piece separately in this case then? What if I have hundreds of pieces? What if I want to get very detailed? Do I have to paint each piece in substance painter? Basically, how can I have reflective glass windows, brick, metal and concrete portrayed accurately on one mesh that that has trim, windows, windowframes, etc. already built into it? That doesn’t even seem possible. A lot of the tutorials I’ve seen seem to glaze over the important texturing process and how overlapping UVs can work. They go from point A: Modeling to Point B: A realistic and beautiful building. Any special insight would be greatly appreciated!
I’m making a PC Game. Basically, how do I make the materials, lay out the model UVs and planning.
Let’s say I wanted to make a whole building like this:
Or even this:

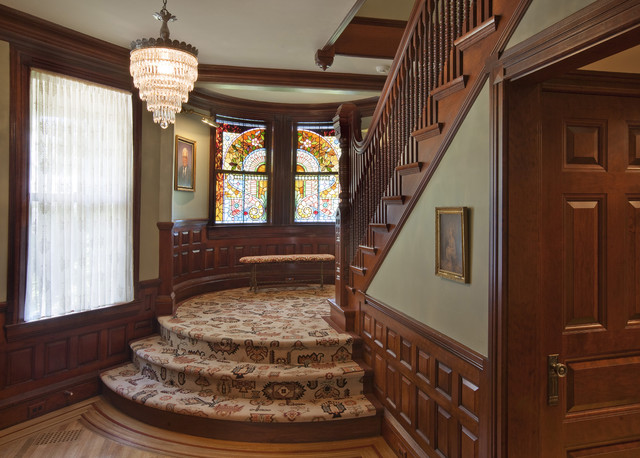
And let’s even go out on a limb to say I’d be making interiors…like this:

And even this:
But for now - how about this:
I’m making inaccessible exteriors. Building faces complete with doorframes, doors, windows, trim, you name it all on one static mesh. How can I have different material properties on that single mesh?
Additionally, let’s say I wanted to make an interior component of many modular pieces…how can I go about effectively adding texture/materials to that?
What if I made an enterable building with exterior AND interior? One side was brick, and the other was plaster, wainscotting and trim/moulding…Mostly complex things like this.
